

Looking for a durable, attractive solution for complex plastic parts? ABS+SAN injection moulding combines strength, surface quality, and design flexibility in one reliable process.
In this guide, you’ll discover how ABS+SAN materials perform, where they’re used, and what to consider when choosing the right injection moulding solution for your product.
Let’s get started.
Understanding ABS and SAN Blends in Injection Moulding
On our production floor, standard ABS sometimes falls short when a project demands higher scratch resistance, enhanced surface clarity, or tighter dimensional stability under load. That is where blending Acrylonitrile Butadiene Styrene (ABS) with Styrene Acrylonitrile copolymer (SAN) becomes a game-changer.
As an injection moulding manufacturer, we use ABS+SAN formulations to hit the exact sweet spot between structural toughness and premium aesthetic finish without switching to far more expensive engineering resins.
How SAN Copolymer Modifies the ABS Matrix
Standard ABS is naturally a two-phase terpolymer: continuous SAN matrix grafted onto dispersed polybutadiene rubber particles. The rubber provides impact resistance, while the SAN phase delivers rigidity, chemical resistance, and thermal stability.
When we modify an ABS formulation by compounding additional SAN copolymer:
Increases Matrix Hardness: Extra SAN expands the continuous rigid phase, raising surface hardness and pencil scratch resistance.
Improves Melt Flow: The higher melt flow index (MFI) of SAN eases thin-wall filling and reduces injection pressure requirements.
Enhances Chemical Resistance: Added SAN increases resistance to household oils, light acids, and cleaning agents.
Sharpens Mould Detail: Lower viscosity allows the melt to pack out complex textures and high-polish tooling cavities with minimal sink.
Impact of SAN Ratio on Rigidity, Gloss, and Impact Resistance
Dialing in the SAN-to-rubber ratio directly dictates your final part performance. Increasing the SAN percentage yields clear processing trade-offs:
- Rigidity & Modulus: Goes up. High-SAN blends show significantly less flex under mechanical load, making them ideal for structural housings and bezels.
- Surface Gloss: Increases dramatically. The parts eject with an ultra-high, mirror-like gloss directly off polished cavity steel.
- Heat Deflection Temperature (HDT): Rises incrementally, giving parts better dimensional resistance in elevated ambient temperatures.
- Impact Resistance: Drops proportionally. As rubber content decreases relative to SAN, Izod impact values fall. Over-loading SAN transforms ductile yield into brittle fracture behavior under shock loads.
Property Comparison: Pure ABS vs. ABS+SAN Compounds
| Mechanical & Thermal Property | Standard Moulding ABS | ABS + SAN Blend (70/30) | High-SAN Compound (50/50) |
|---|---|---|---|
| Tensile Modulus (MPa) | 2,100 – 2,300 | 2,500 – 2,800 | 2,900 – 3,200 |
| Flexural Strength (MPa) | 65 – 75 | 80 – 92 | 95 – 110 |
| Notched Izod Impact (kJ/m²) | 18 – 25 | 10 – 14 | 5 – 8 |
| Rockwell Hardness (R-scale) | 103 – 108 | 110 – 115 | 116 – 122 |
| HDT at 1.8 MPa (°C) | 82 – 86 | 88 – 93 | 92 – 97 |
| Surface Gloss (60° Gardner) | 75 – 85% | 90 – 95% | > 95% |
| Melt Flow Index (g/10 min) | 15 – 20 | 22 – 30 | 28 – 38 |
Material Preparation and Pre-Drying for ABS+SAN
Moisture is the fastest way to ruin an ABS+SAN injection moulding run. Both acrylonitrile butadiene styrene and styrene acrylonitrile copolymer resin are naturally hygroscopic. When pellets sit in an open plant environment, they pull moisture straight out of the ambient air.
If you feed wet resin into the barrel, that trapped water boils instantly at processing temperatures. The steam expands through the melt flow, blowing out surface finish, creating silver streaks, and destroying the mechanical bonding between the SAN phase and the rubber core. When processing high-gloss or transparent aesthetic parts, skipping proper drying guarantees rejected parts.
Recommended Drying Parameters
We run our blends through a closed-loop desiccant hopper drying system before any material hits the feed throat. Standard hot-air ovens simply circulate ambient humidity back onto the pellets.
| Drying Parameter | Target Setting |
|---|---|
| Dryer Type | Desiccant Hopper Dryer |
| Drying Temperature | 80°C – 85°C (176°F – 185°F) |
| Dwell Time | 2 to 4 hours |
| Air Dew Point | -40°C (-40°F) or lower |
| Max Moisture Content | < 0.02% (Max 0.05% for non-cosmetic parts) |
Note: Do not exceed 90°C during pre-drying. Excessive heat clogs the hopper throat by softening the SAN component, causing pellet bridging and feed interruptions.
Identifying Moisture Splay vs. Shear Degradation
Distinguishing between water contamination and shear heating degradation on the shop floor saves hours of blind tweaking. Both leave silver or dark streaks across the part surface, but their root causes require completely opposite fixes.
- Moisture Splay (Melt Hydrolysis):
- Visual cues: Cloudy, silvery streaks shaped like U-patterns fanning out from the gate across the flow path.
- Purge check: Purge a shot into open air without injection pressure. If the puddle froths, bubbles, pops, or emits steam, the resin is still wet.
- The fix: Increase drying time or verify dryer regeneration beds.
- Shear Degradation (Thermal Breakdown):
- Visual cues: Yellowish or brown scorched streaks along sharp corners, knit lines, or restrictive gates.
- Purge check: Open air purge appears smooth and glossy, with no bubbling, but parts show burned traces near high-velocity zones.
- The fix: Lower the injection speed, open the gate lands, or adjust the screw back pressure.
For a deeper dive into separating process-induced flaws from resin issues, reference our guide to defects in injection molding and their troubleshooting to keep your presses running cleanly.
Key Injection Moulding Machine Parameters for ABS+SAN
Dialing in the process window for an ABS and styrene acrylonitrile copolymer blend takes balanced control. If the barrel runs too hot, the rubber phase degrades; run it too cold, and you get dull patches and weak knit lines. As a professional injection molding manufacturer and supplier, we recommend starting from the baseline settings below on a reliable injection molding machine for sale to keep parts rigid, glossy, and dimensionally stable.
Recommended Processing Window for ABS+SAN
| Parameter Group | Recommended Shop-Floor Range | Notes & Targets |
|---|---|---|
| Rear Zone (Feed) | 190°C – 210°C (374°F – 410°F) | Prevents premature bridging at the feed throat |
| Middle Zones | 210°C – 235°C (410°F – 455°F) | Gradual plasticizing without material shear |
| Front & Nozzle | 225°C – 245°C (437°F – 473°F) | Matches actual melt temperature target |
| Actual Melt Temp | 220°C – 240°C (428°F – 464°F) | Keep below 255°C to avoid polymer burning |
| Mold Temperature | 50°C – 80°C (122°F – 176°F) | Higher temps boost surface gloss and flow |
| Injection Pressure | 70 – 120 MPa (700 – 1200 bar) | Fills thin-wall ribs cleanly |
| Holding Pressure | 40% – 60% of injection pressure | Pack to gate freeze to stop sink marks |
| Back Pressure | 0.5 – 1.5 MPa (5 – 15 bar) | Stable plasticizing without shearing SAN chains |
| Screw Speed | 40 – 70 RPM | Prevents localized shear heating degradation |
Melt Temperature Profiles Across Barrel Zones
During acrylonitrile butadiene styrene processing with added SAN, never ramp heat up too early in the rear zone. Keep the feed zone relatively cool to maintain positive screw bite. Transition smoothly through the middle zones, topping out at the nozzle at roughly 230°C to 240°C. If your cycle stops unexpectedly, drop heats immediately—stagnant melt turns yellowish and brittle in under five minutes.
Mold Temperature Optimization for Surface Gloss and Cycle Efficiency
Mold temperature directly determines cosmetic finish and cycle time optimization:
- High Gloss Parts (Class-A surfaces): Run the tool at 65°C to 80°C. The hotter tool surface allows the SAN-rich outer skin to replicate mold steel texture before freezing.
- Rapid Cycling Parts: Run closer to 50°C to 60°C if parts will receive matte finishes or secondary texturing.
- Balancing Act: Keep core-to-cavity differential under 5°C to prevent differential pull and warp after ejection.
Pressure Control: Injection, Pack, and Screw Back Pressure
ABS+SAN resins display moderate viscosity that responds sharply to pressure adjustments:
- First-Stage Injection: Fill to 95% volume using stepped velocity profiles—slow across the gate to prevent jetting, fast through main walls, and slow at end-of-fill. A real-time cavity pressure sensor helps catch short shots before pack-out.
- Packing and Holding: Hold steady at 50% of peak injection pressure until gates freeze. Over-packing near the gate spikes localized stress and leads to cracking during downstream assembly.
- Back Pressure: Run only enough back pressure (5 to 12 bar) to get a uniform, bubble-free melt pool. Excessive back pressure cuts SAN polymer chains and ruins toughness.
Cooling Phase Adjustments to Minimize Residual Molded Stress
Stiff SAN chains make the blend prone to locked-in molecular orientation. Use these practical cooling rules:
- Cooling Time: Set cooling so parts drop below heat deflection temperature (HDT) before pin ejection—typically 1.2 to 1.8 seconds per millimeter of nominal wall thickness.
- Uniform Cooling Lines: Ensure turbulent water flow (Reynolds number > 4,000) through all circuits. Uneven cooling rates between core and cavity directly translate to residual molded stress and twisted housings.
- Smooth Ejection: Optimize ejector speed and stroke to avoid white stress marks on deep ribs and bosses.
Mould and Tooling Design Specifications for ABS+SAN
Tooling for ABS+SAN injection moulding requires strict attention to stiffness, thermal balance, and venting. Because adding SAN boosts melt viscosity and notch sensitivity compared to standard ABS, poor tool choices will quickly bite you with blush marks, jetting, or trapped gas burns.
Understanding the advantage and disadvantage of injection moulding tooling setups helps us engineer dies that balance part aesthetics with high-volume tool longevity.
Gate Selection: Edge, Sub-Gate, and Hot Runner Tips
The right runner and gate geometry keeps shear heating low while delivering uniform packing across thick and thin walls.
- Edge Gates: Our default choice for flat, structural panels. Size the gate depth to 50%–75% of the nominal wall thickness. Keep the land short (under 1.0 mm) to avoid pressure drops and freeze-off before complete packing.
- Sub-Gates (Tunnel Gates): Perfect for automated high-speed runs. Use an angle between 30° and 45° with a minimum diameter of 1.2 mm to 1.8 mm. Any smaller and high shear will cause localized material degradation and gate blush.
- Hot Runner Systems: Internally heated nozzles can cause material stagnation and black specks. We recommend valve gate hot runners with direct-tip heating to prevent drool, eliminate stringing, and cut cycle times.
Venting Depth and Location
SAN copolymers generate volatiles under high injection speeds. If trapped air can't escape, diesel burning ruins the cosmetic surface.
- Primary Parting Line Vents: Depth of 0.025 mm to 0.040 mm (0.001" to 0.0015"), with a land width of 1.5 mm, relieved back to atmosphere by 0.8 mm to 1.0 mm.
- Blind Pockets & Rib Ends: Add venting ejector pins or porous steel inserts at the end of fill paths.
- Weld Line Intersections: Always vent where flow fronts merge to reduce optical witness lines and build weld line integrity.
Tool Shrinkage Rates and Compensation Factors
ABS+SAN is an amorphous polymer blend, meaning low, isotropic shrinkage across both flow and cross-flow directions.
| Material Matrix | Average Mold Shrinkage Rate | Cross-Flow Shrinkage | Gating Area Compensation |
|---|---|---|---|
| Standard Unfilled ABS | 0.45% – 0.70% | 0.50% – 0.75% | +0.05% near gate |
| High-SAN ABS Blend | 0.35% – 0.55% | 0.40% – 0.60% | Baseline |
| Glass-Reinforced ABS+SAN | 0.15% – 0.30% | 0.30% – 0.50% | Direct tooling cut to spec |
Compensation rule: For tight tolerance enclosures, keep steel safe by machining inner cores larger and outer cavity walls smaller by 0.05 mm on critical mating dimensions.
Draft Angles, Surface Finishes, and Ejection
SAN increases part rigidity, making parts less forgiving during demoulding. Insufficient draft causes heavy drag marks and high ejection forces that spike residual molded stress.
- Draft Angles: Apply a minimum of 1.0° to 1.5° on core shut-offs and smooth cavity walls. For textured surfaces (SPI or Mold-Tech), add 1.0° of draft per 0.025 mm (0.001") of texture depth.
- Core & Cavity Finish: For high-gloss cosmetic bezels, polish the cavity up to SPI-A2 (diamond paste polish). Treat cores with SPI-B1 or SPI-C1; a slightly micro-textured core prevents vacuum locking and keeps parts stuck to the moving side during tool open.
- Ejector Pin Layout: Use broad, flat ejector blades or sleeve ejectors under perimeter walls and deep ribs rather than small-diameter pins. This prevents punch-through, pin witness stress marks, or white whitening on the final molded part.
Troubleshooting Common ABS+SAN Moulding Defects
Running an ABS+SAN blend can be tricky on the shop floor. When you add styrene acrylonitrile copolymer to an ABS base, you gain rigidity and surface gloss, but you shrink your processing window. If your pressures, temperatures, or gate configurations are off by even a small margin, surface defects and structural failures show up immediately. As a custom molder running these resins daily, we use targeted fixes to keep cycle times tight and scrap rates near zero.
Fixing Silver Streaks, Moisture Splays, and Air Burns
When silver streaks show up on the part, we first determine whether the root cause is trapped moisture or shear degradation:
- Moisture Splays: SAN absorbs moisture rapidly. If your moisture content is above 0.05%, U-shaped splay marks run along the flow direction. We immediately inspect the desiccant hopper drying system to ensure dew points sit at -40°F (-40°C) and material cooks at 175°F to 185°F (80°C to 85°C) for at least 2 to 4 hours.
- Shear Heating Degradation: If splays appear even when the resin is dry, the material is overheating in the barrel or shearing through the gate. We cut back screw rotation speed, drop back pressure to 50–100 psi, and radius the gate entry.
- Air Burns (Dieseling): Dark brown or black scorching at the end of the flow path happens when trapped air cannot escape fast enough. We clean clogged tool vents and recut parting lines to a standard 0.0015-inch (0.038 mm) vent depth.
Preventing Warpage, Differential Shrinkage, and Sink Marks on Ribs
SAN boosts the stiffness of the matrix, but uneven cooling creates high residual molded stress that twists parts after ejection.
- Warpage & Dimensional Shift: Uneven core and cavity temperatures pull the part out of tolerance. We balance water line circuits so temperature variation across the mold face stays within 5°F (3°C).
- Sink Marks on Ribs: Because ABS+SAN features a mold shrinkage rate of roughly 0.4% to 0.7%, thick rib-to-wall intersections draw in plastic as they solidify. We step down nominal wall-to-rib ratios to 40–50%, raise holding pressure, and extend the pack phase until the gate freezes completely.
Strengthening Weld Lines and Hiding Knit Lines on Visible Surfaces
A major headache with ABS+SAN injection moulding is weak weld lines. The high SAN content reduces molecular entanglement at the melt front interface.
- Increase Melt Front Temperature: Cold melt fronts simply butt together without fusing. We raise the nozzle and front barrel zone temperatures by 10°F to 15°F and increase tool cavity temperatures.
- Adjust Injection Velocity: Speed up the injection velocity just before the flow fronts merge to reduce premature crusting, then step down pressure slightly to avoid jetting.
- Relocate Gates: If mechanical stress rests directly on a knit line, we change gate locations or add flow tabs to push the weld line into non-critical, hidden areas.
Solving Part Brittleness, Delamination, and Short Shots
When parts fracture on ejection or peel like an onion, the problem typically tracks back to processing shear or melt flow mismatch. For an in-depth breakdown of standard shop-floor issues, our complete guide to defects in injection molding and their troubleshooting provides additional baseline steps.
- Delamination: Skin-core separation happens when incompatible regrind enters the stream or excessive shear stress strips the SAN-rich phase from the polybutadiene rubber core. We reduce injection speeds and ensure virgin-to-regrind blending ratios are strictly controlled.
- Short Shots: High-viscosity blends resist filling thin walls. We optimize the melt temperature profile, increase first-stage injection pressure, and enlarge runner diameters to eliminate excessive flow resistance.
- Part Brittleness: Lowering barrel residence times avoids thermal breakdown of the SAN polymer chains. We size the shot size to fall within 35% to 65% of the total barrel capacity.
Quick ABS+SAN Defect Troubleshooting Matrix
| Defect Observed | Primary Shop-Floor Cause | Corrective Machine Adjustment |
|---|---|---|
| Silver Splay | High moisture / excessive shear | Check desiccant dryer; reduce screw RPM and backpressure |
| End-of-Fill Air Burn | Poor tool venting / fast fill at end | Clean vents; profile injection speed to slow down at 95% fill |
| Sink Marks | Short pack time / low hold pressure | Increase hold pressure; run gate freeze study to set hold time |
| Weak Weld Lines | Cold melt front / insufficient packing | Boost mold temp by 10°F–20°F; increase front-zone barrel temp |
| Delamination | Severe shear stress / contamination | Enlarge gate sizes; lower primary injection speed |
Secondary Finishing and Assembly for ABS+SAN Injection Moulding
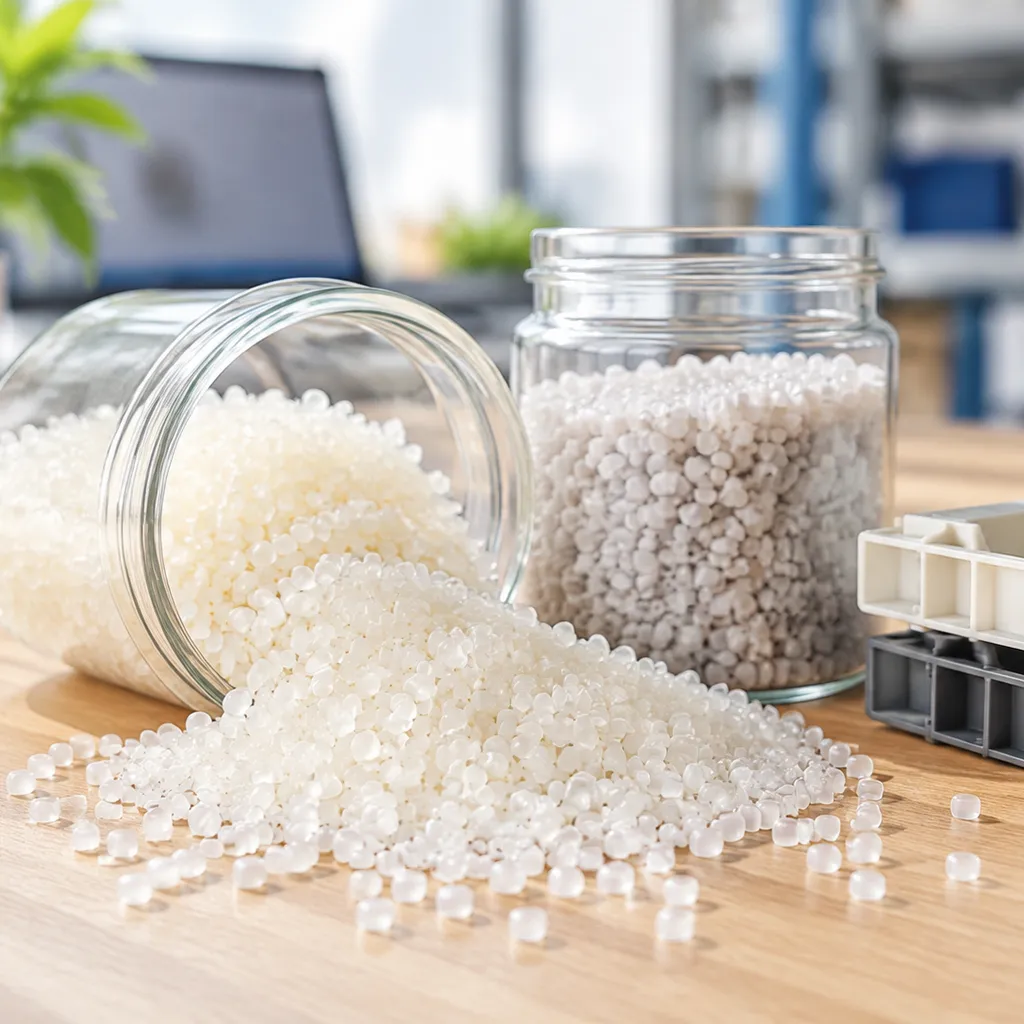
Getting a molded part out of the press is only half the battle. When running ABS+SAN injection moulding, the higher styrene-acrylonitrile content gives parts exceptional surface hardness and clarity, but it also alters how the material reacts to plating chemicals, assembly solvents, and mechanical loads.
Surface Readiness for Painting, Electroplating, and Vacuum Metallization
SAN boosts chemical resistance and scratch performance, but changing the rubber-to-copolymer ratio directly affects downstream plating baths:
- Electroplating considerations: Standard electroplating grade ABS relies on chromic acid etching to dissolve butadiene rubber spheres, creating anchor points for electroless nickel. Because SAN adds rigid matrix volume without butadiene sites, etch windows are narrower. We control etch bath times tightly to prevent under-etching (poor adhesion) or over-etching (surface pitting).
- Painting and vacuum metallization: The natural high gloss of SAN creates a pristine mirror surface for physical vapor deposition (PVD). However, mold release agents will ruin adhesion. We run molds dry whenever possible. When painting, we use low-solvent coatings or UV-cured systems to prevent surface crazing caused by aggressive paint thinners attacking the rigid styrene chains.
Ultrasonic Welding, Solvent Bonding, and Snap-Fit Design
The extra rigidity of SAN alters how we assemble finished parts:
| Assembly Method | Key Engineering Parameter | Shop-Floor Rule |
|---|---|---|
| Ultrasonic Welding | Amplitude: 25–35 µm; Shear joint design | SAN transmits acoustic energy better than soft rubber; weld times are 15–20% faster than pure ABS. |
| Solvent Bonding | Solvents: MEK, acetone, or dichloroethane | Sets almost instantly. Apply solvent sparingly to prevent stress-cracking crazes along the joint line. |
| Snap-Fit Joints | Maximum strain limit: ≤ 1.2% to 1.5% | SAN lowers elongation at break. Design thicker roots with generous radii (R ≥ 0.5 × wall thickness) to avoid snapped lugs. |
To support tighter assembly tolerances across high-volume automotive and electronics runs, our expanded moulding production capacity utilizes automated assembly fixtures and precision ultrasonic presses to maintain zero-defect output.
Thermal Annealing to Relieve Residual Molded Stress
High-rigidity ABS+SAN parts retain higher molded-in stresses than standard ABS, making them vulnerable to environmental stress cracking (ESC) when exposed to cleaning agents, lubricants, or solvents.
- Target Temperature: Set your annealing oven between 70°C and 85°C (158°F–185°F), roughly 10°C below the heat deflection temperature (HDT).
- Soak Time: Maintain 1 hour per 1 mm (0.040 in) of maximum part wall thickness.
- Controlled Cooling: Never pull hot parts directly into ambient shop-floor air. Ramp the oven down slowly at a rate not exceeding 10°C to 15°C per hour until parts drop below 40°C. Rapid quenching recreates the very surface stresses annealing is meant to eliminate.
Commercial and Engineering Applications for ABS+SAN Injection Moulding
We run ABS+SAN blends whenever a customer needs the high-impact toughness of standard ABS alongside the surface hardness, gloss, and chemical resistance of styrene acrylonitrile copolymer. By tailoring the blend ratio in the press, we meet strict structural and cosmetic requirements across major global manufacturing sectors.
Automotive Interior Trims, Instrument Clusters, and Air Vents
Automotive interiors punish soft plastics. UV exposure, dashboard heat build-up, and everyday contact demand materials that will not warp, scratch, or creak.
- Instrument clusters: SAN additions boost tensile modulus and clarity, preventing lens haze and maintaining a tight fit against vibration.
- A/C louvers and air vents: The higher heat deflection temperature (HDT) prevents thin vent slats from sagging under continuous hot air cycles.
- Decorative trim bezels: Blended compounds accept secondary metallic coatings cleanly, serving as a reliable alternative to standard electroplating grade ABS.
Consumer Electronics Housings, Bezels, and Smart Device Casings
Electronics housings need rigid side walls, crisp edges, and minimal wall thickness to shave down overall weight.
- Monitor bezels and tablet frames: The improved melt flow index (MFI) fills thin-wall geometries smoothly without causing excessive residual molded stress.
- Smart home interfaces: SAN enhances surface hardness, cutting down on visible micro-scratches on polished touch panels.
- Precision enclosure tolerance: Much like our approach to high-precision plastic injection molding for medical device market enclosures, our ABS+SAN injection moulding keeps assembly snap-fits aligned over high-volume production runs.
| Application Type | Primary Blend Benefit | Core Processing Requirement |
|---|---|---|
| Instrument Bezels | High surface hardness, scratch resistance | High mold temperature for deep gloss |
| Smart Device Frames | Dimensional stability, thin-wall flow | Balanced injection speed to cut shear |
| Appliance Fascias | Chemical and detergent resistance | Consistent pack pressure to kill sink marks |
Household Appliance Panels and Aesthetic Parts
Kitchen and laundry appliances face daily exposure to oils, detergents, and cleaning chemicals that cause stress cracking in standard polymers.
- Front-loading washer fascias: SAN provides the chemical shield against concentrated detergents and perfumes.
- Coffee machine front panels: Delivers premium depth of color, piano-black gloss, and steam resistance around dispensing heads.
- Transparent and tinted aesthetic covers: Formulating with clear SAN grades lets us mold translucent display windows and indicator lenses directly into the body architecture, unlocking real cycle time optimization on the factory floor.
Frequently Asked Questions About ABS+SAN Injection Moulding
Can you blend SAN regrind directly into virgin ABS at the press?
We do not recommend dry-blending scrap SAN directly into virgin ABS at the press hopper. While both belong to the styrenic family, simple tumble blending cannot provide the high-shear distributive mixing required to bond the phases properly.
Without twin-screw melt compounding, salt-and-pepper press blending creates:
Melt flow variations: Unpredictable viscosity spikes that destabilize cavity filling.
Surface delamination: Flaking and mica marks near the gates due to poor phase compatibility.
Impact loss: Incomplete incorporation of the butadiene rubber phase, leaving the molded part brittle.
If you must reclaim material, limit clean, properly dried regrind to under 15% in pre-compounded lots rather than feeding raw SAN injection molding regrind directly into the feed throat.
How does higher SAN content affect cycle times and flowability?
Adding SAN copolymer significantly boosts both processing speed and flow behavior compared to running standard ABS injection molding compounds:
- Improved Flow Rates: SAN lowers overall melt viscosity, yielding a higher melt flow index (MFI). This lets us fill thin-walled sections at lower injection pressures.
- Faster Solidification: SAN increases the compound's heat deflection temperature (HDT) and structural modulus. Because the part reaches ejection rigidity at higher temperatures, in-mold cooling times drop by 10% to 20%, driving down total cycle times.
| Property Shift | High-ABS Blend | High-SAN Blend | Production Impact |
|---|---|---|---|
| Melt Viscosity | Higher | Lower | Easier flow through thin wall ribs |
| Ejection Temperature | Lower | Higher | Shorter required cooling time |
| Part Rigidity | Moderate | High | Faster cycle time with zero pin push-out marks |
What is the ideal barrel residence time before thermal degradation occurs?
For stable ABS+SAN injection moulding, maintain a barrel residence time between 2 and 4 minutes. The absolute maximum limit is 6 minutes at a standard melt range of 220°C to 240°C (428°F to 464°F).
Exceeding this window triggers two distinct degradation modes:
The styrene-acrylonitrile matrix yellows rapidly and releases volatile gas, generating splay marks.
The polybutadiene rubber phase in the ABS cross-links, forming hard black specks and destroying impact resistance.
When cycle interruptions last longer than 5 minutes, purge the barrel clean immediately with standard HDPE or a dedicated purging compound.
Why are ABS+SAN parts showing stress cracking during post-mold assembly?
Post-mold stress cracking typically stems from SAN's inherent notch sensitivity interacting with high molded-in residual stresses and assembly chemicals. SAN delivers exceptional surface gloss and hardness, but it lowers the material's elongation at break.
To eliminate stress cracking:
Lower Holding Pressure: Pack the part just enough to prevent sink marks. Over-packing traps intense compressive and tensile stresses near the gate.
Raise Tool Temperatures: Run your mold steel between 50°C and 70°C (122°F to 158°F). Warmer cavities allow polymer chains to relax during fill rather than freezing in high-shear orientations.
Check Chemical Exposure: Prevent contact with solvent-based thread lockers, aggressive degreasers, or ester-based lubricants during assembly, as SAN matrices are prone to environmental stress cracking (ESC) when stressed.
Increase Boss Radii: Ensure assembly screw bosses and snap fits carry a base radius of at least 25% to 50% of the adjacent wall thickness to spread mechanical loads evenly.
Related Sources
- https://www.ineos-styrolution.com/INTERSHOP/static/WFS/Styrolution-Web-Site/-/Styrolution/en_US/downloads/Luran_Processing_Guide.pdf
- https://xometry.com/resources/injection-molding/abs-injection-molding/
- https://www.ineos-styrolution.com/INTERSHOP/static/WFS/Styrolution-Web-Site/-/Styrolution/en_US/downloads/Terluran_Processing_Guide.pdf
- https://omnexus.specialchem.com/selection-guide/styrene-acrylonitrile-san-plastic
 English
 French
 German
 Spanish
 Italian
 Polish
 Russian
 Japanese
 Korean
 Arabic
 Dutch
 Portuguese
 Swedish
 Norwegian
 Belarusian
 Armenian