
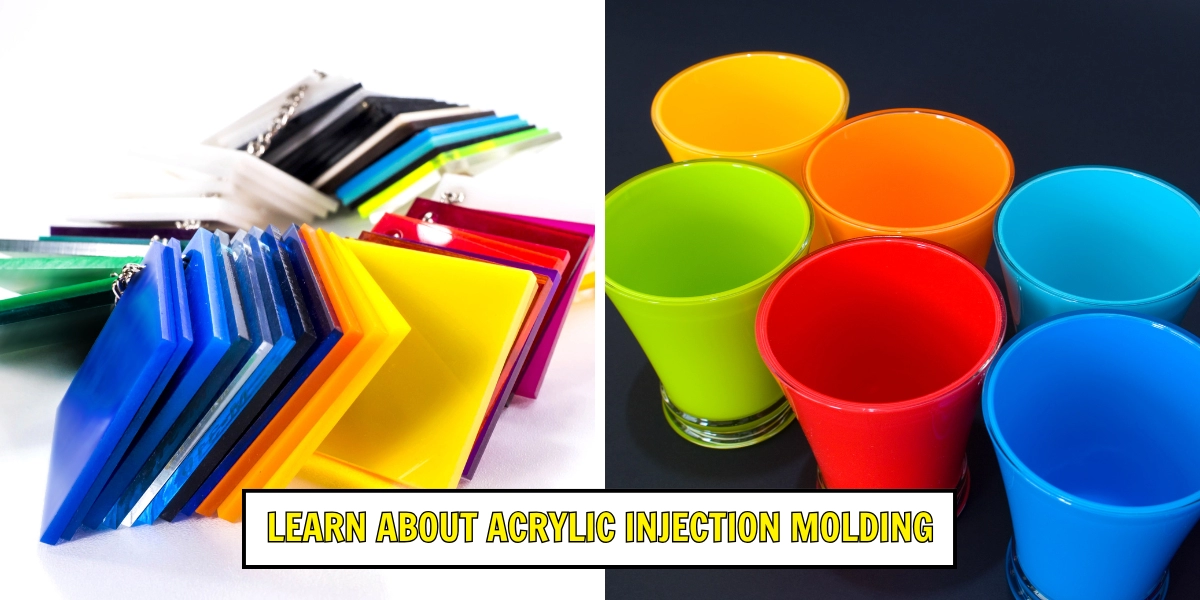
Why Injection Moulded Acrylic (PMMA) Is So Popular
Injection molded acrylic, or PMMA, stands out as a top choice for many industries thanks to its impressive performance and versatility. One of its biggest advantages is optical clarity, with light transmission levels reaching up to 92%, making it ideal for applications demanding clear, bright visuals. This clarity rivals glass while being much lighter and more impact-resistant.
Another key benefit is its excellent weather and UV resistance. PMMA maintains its transparency and physical properties even after prolonged outdoor exposure, resisting yellowing or degradation caused by sunlight and harsh conditions. This makes it perfect for products exposed to the elements.
For applications needing extra toughness, impact-modified PMMA grades are available. These high-impact versions provide enhanced durability without sacrificing clarity, expanding the material’s usability in areas requiring shock or drop resistance.
Typical uses of injection molded acrylic include:
- Automotive lenses and headlamp covers
- Optical light guides and display panels
- Premium cosmetic and personal care packaging
- Medical devices needing biocompatibility and transparency
- Consumer electronics with crystal-clear screens and touch panels
In short, injection molded acrylic combines superior clarity, durability, and weather resistance, making it a popular and practical choice across multiple high-demand markets.
Material Science Basics – Which Acrylic Grades Work Best
When it comes to acrylic injection molding, choosing the right PMMA grade is crucial for getting top results. Standard PMMA offers excellent optical clarity and weather resistance, perfect for many common applications. However, specialized grades are often better suited for specific needs:
- High-flow PMMA: Designed for complex or thin-walled parts, these grades have a higher Melt Flow Index (MFI), making the material easier to inject with fine detail.
- Impact-modified PMMA: These versions boost toughness without sacrificing clarity, great for parts that need extra durability like automotive lenses.
- Optical grade PMMA: Engineered for maximum clarity and minimal birefringence, commonly used in precision optical components and display technologies.
- Heat-resistant PMMA: These grades withstand higher temperatures, ideal for applications with exposure to elevated heat.
Some of the key suppliers offering a broad range of acrylic resins include Mitsubishi Chemical, Sumitomo Chemical, LG Chem, and Plaskolite. These industry leaders provide materials tailored for injection molding processes, ensuring consistency and quality.
For injection molding acrylic, the Melt Flow Index (MFI) is an important consideration. Typically, grades with an MFI between 3 to 10 g/10 min balance flowability and mechanical properties well. Higher MFI materials flow easier into molds but may sacrifice some strength, while lower MFI grades offer better toughness but require more injection pressure.
Selecting the right acrylic grade based on your part’s complexity, clarity demands, and mechanical needs keeps the molding process efficient and the end product high quality. For more on how injection molding works and what material choices impact the process, you can check out our detailed overview of what is injection moulding.
The Injection Molding Process for Acrylic – Step by Step
Injection molding acrylic (PMMA) requires careful control of process steps to achieve high-quality, clear parts. Here’s a quick rundown of the key stages:
-
Material drying
Acrylic is very sensitive to moisture, so thorough drying is critical. Typically, you’ll dry the resin for 4 to 6 hours at 80–90 °C to remove moisture that can cause defects like bubbles and splay marks.
-
Barrel temperature profile
Set the barrel temperature between 210 and 260 °C. This range ensures proper melting and flow without degrading the acrylic. The exact temperature depends on the grade used, whether it’s standard PMMA or impact-modified.
-
Mold temperature
Keep your mold between 70 and 110 °C to optimize clarity and reduce internal stresses. Higher mold temps help acrylic parts solidify with better surface finish and optical properties.
-
Injection pressure and speed
Adjust injection pressure and speed carefully. Too fast or too high pressure can cause jetting or silver streaks, while too low can lead to short shots. Fine-tuning this ensures smooth, consistent filling.
-
Cooling time and ejection
Cooling typically ranges from 15 to 45 seconds depending on wall thickness. Proper cooling prevents warping and maintains dimensional accuracy. After cooling, eject the part gently to avoid surface defects.
-
Cycle times
Total cycle times generally fall between 25 and 60 seconds. Thinner walls mean faster cycles, but maintaining quality and clarity takes priority over speed.
Mastering these steps in the acrylic injection molding process is essential for producing crystal-clear, durable parts. For more details on controlling surface defects and optimizing your molds, check out our guide on control flash in injection molding.
Mold Design Considerations for Crystal-Clear Results
To get injection molded acrylic parts with perfect clarity, mold design is key. Here’s what you should focus on:
- Highly polished cavity surfaces: Using SPI-A1 or A2 polish grades on mold cavities ensures a smooth finish that helps maximize transparency and optical quality.
- Generous draft angles and radiused edges: These help parts release easily without scuffing or stress marks, which can ruin clarity.
- Hot-runner systems vs cold runners: Hot runners reduce material waste and keep PMMA flowing smoothly, avoiding temperature drops that cause defects. Cold runners can create extra scrap and sometimes affect surface finish.
- Venting strategies: Proper venting prevents trapped air that leads to burn marks and bubbles. This is crucial when molding transparent acrylic to avoid visible flaws.
- Gate types and location: Selecting gates that minimize flow lines and placing them in less visible areas help maintain an even surface free of jetting or splay marks, especially for optical parts like lenses and light guides.
Keeping these mold design factors in check guarantees your injection molded acrylic will look crystal clear, meeting the high standards needed for optical-grade PMMA projects. For a detailed overview of injection molding methods, check out our guide on types of injection molding.
Common Defects in Injection Molded Acrylic and How to Fix Them

When working with injection molded acrylic (PMMA), a few defects can pop up that affect the clarity and quality of the final part. Here’s a quick rundown of the common issues and how to prevent them:
-
Silver Streaks / Splay Marks
These shiny lines happen when moisture or gases get trapped in the melt. The key fix is thorough drying of acrylic resin before molding—about 4 to 6 hours at 80–90 °C—and maintaining good barrel venting.
-
Jetting
Jetting occurs when the molten acrylic shoots into the cavity too fast, causing a snake-like pattern. To avoid this, adjust the injection speed and pressure to be smoother and slower at the gate, plus optimize gate design for better flow.
-
Sink Marks and Voids
These surface dents and internal air pockets appear due to uneven cooling or insufficient packing pressure. Use well-controlled cooling times, proper mold temperature (70–110 °C), and adequate pack/hold pressure to minimize these defects.
-
Yellowing or Browning
Overheating or prolonged exposure to high temperatures during molding can discolor acrylic parts. Keep barrel temperatures within optimal ranges (210–260 °C) and avoid excessive residence time in the barrel.
-
Birefringence (Stress Patterns Under Polarized Light)
Internal stress in the molded part causes light distortion visible under polarized light. Reduce injection speed, increase mold temperature, and use balanced cooling to lower residual stresses.
Addressing these issues ensures your injection molded acrylic parts stay crystal clear and meet high optical standards. For more on optimal molding conditions and material selection, check out our detailed guide on plastics for injection moulding.
Injection Moulded Acrylic vs Cast Acrylic – Side-by-Side Comparison
When deciding between injection moulded acrylic and cast acrylic, understanding their key differences helps you pick the right material for your project. Here's a clear comparison to guide your decision:
| Feature | Injection Moulded Acrylic | Cast Acrylic |
|---|---|---|
| Optical Clarity | Up to 92% light transmission | Up to 93-94% light transmission |
| Tolerances | Tight, consistent for complex shapes | Less precise, better for flat or thick parts |
| Minimum Order Quantity (MOQ) | Typically higher due to tooling | Lower MOQs, easier for small runs |
| Lead Time | 4–8 weeks (tooling and production) | 2–4 weeks (casting and finishing) |
| Cost per Part | Lower at high volumes | Higher material cost; labor-intensive finishing |
| Maximum Part Size | Limited by injection molding machine | Larger panels and sheets available |
| Surface Finish | Excellent, needs well-polished molds | Naturally smooth, easy to polish |
| Material Options | Impact-modified and optical grades | Mostly standard PMMA grades |
| Wall Thickness | 0.4 mm up, limited by flow | Flexible; thick sections possible |

 English
 French
 German
 Spanish
 Italian
 Polish
 Russian
 Japanese
 Korean
 Arabic
 Dutch
 Portuguese
 Swedish
 Norwegian
 Belarusian
 Armenian